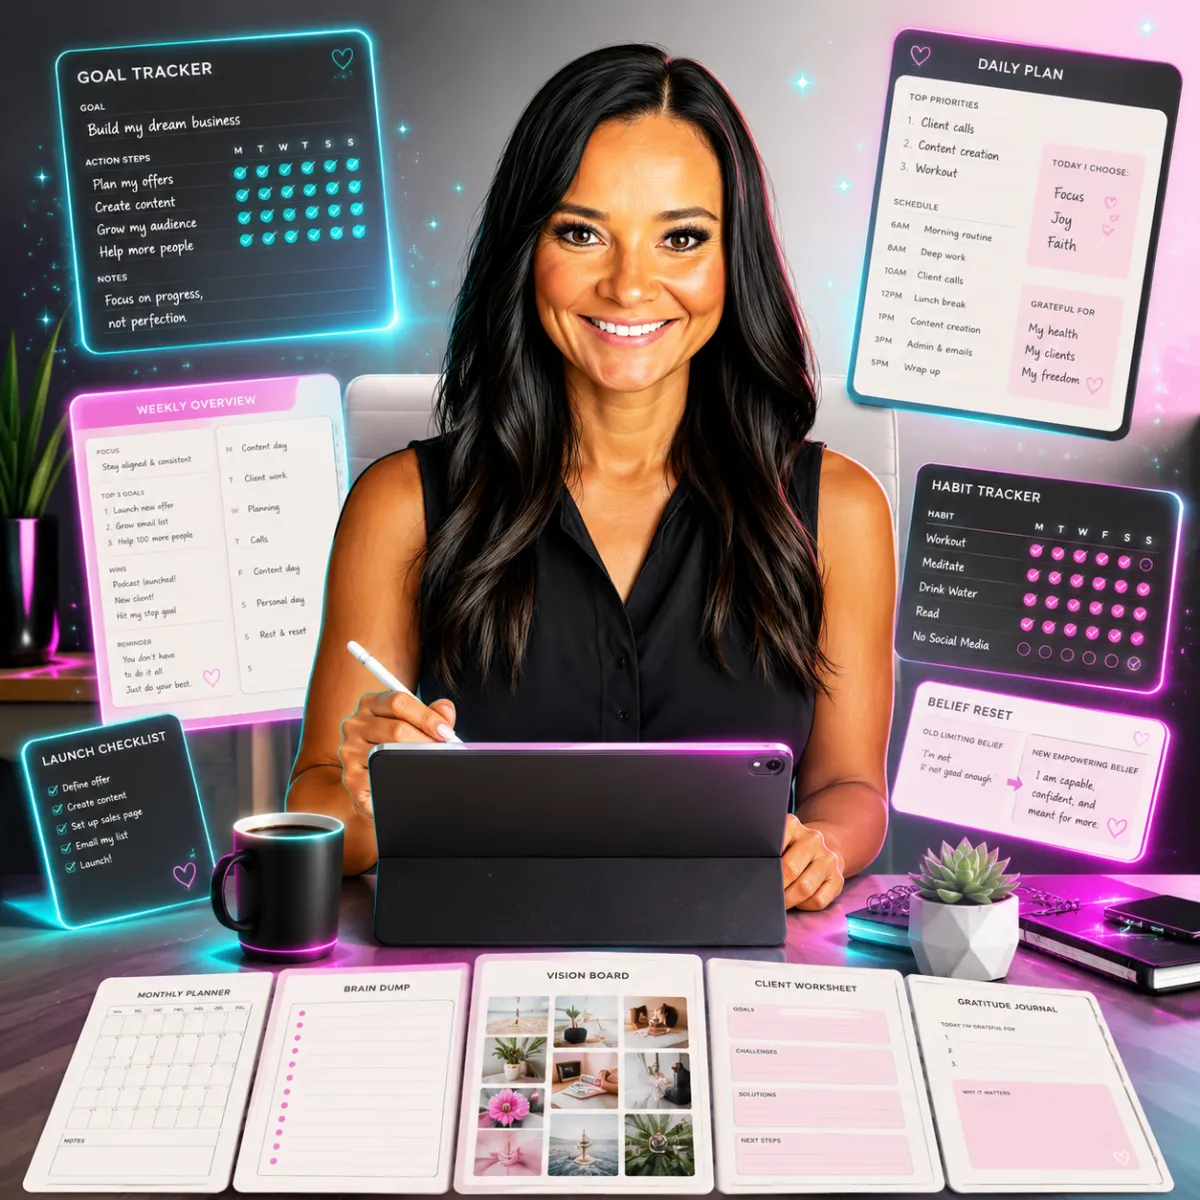
Create Templates
Turn a Repeated Process Into a Reusable Digital Product
A template gives someone a useful starting point.
Instead of beginning with a blank page, empty spreadsheet, unfinished design, or unorganized process, the customer receives a structure they can customize and use.
Templates may help people:
Save time
Organize information
Follow a repeatable process
Create something more quickly
Make fewer beginner mistakes
Maintain consistency
Feel less overwhelmed
Start with greater confidence
A template does not need to be complicated.
It may be:
One document
One spreadsheet
One presentation
One social graphic
One planning page
One email framework
One product-listing format
One reusable workflow
The Template Maker Win helps you turn a repeated task, proven format, or useful structure into a digital product another person can customize.
Your goal is simple:
Identify something people repeatedly create, build a useful starting structure, test it, and publish or share the finished template.

Your Template Maker Win
You will complete this Win by:
Choosing one specific template user.
Identifying one repeated task or project.
Defining what the template helps the user create.
Selecting the best template format.
Researching how the task is normally completed.
Deciding which parts should be prebuilt.
Creating clear sections, fields, or placeholders.
Adding instructions and examples.
Testing the template from a clean copy.
Confirming that the user can customize it.
Creating preview images.
Publishing, selling, delivering, or sharing it.
Assigning a product number.
Submitting the completed Win for the official Template Maker Badge.
You do not need to make a sale before earning the badge.
The Win is creating one original, reusable template that helps another person complete something more easily.
Quick Win Overview
Category: Create
Experience Level: Beginner
Startup Cost: Free to approximately $25
Time to Start: One weekend
Where You Can Work: From home
Income Type: One-time or repeatable income
Recommended First Product: One simple editable template
Official Badge: Template Maker
What Is a Template?
A template is a reusable starting structure.
It may already include:
Headings
Sections
Formulas
Prompts
Placeholders
Page layouts
Sample wording
Example entries
Instructions
Formatting
Brand-neutral design
Repeated steps
The user replaces the example content with their own information.
A strong template reduces the amount of work required to create a finished result.
Template Examples
Business Templates
Client intake form
Proposal template
Service agreement outline
Project brief
Meeting agenda
Standard operating procedure
Content calendar
Monthly business review
Customer follow-up email
Workshop planning document
Lead tracker
Client onboarding checklist
Marketing campaign planner
Reseller Templates
eBay product-listing template
Inventory spreadsheet
Profit tracker
Product research worksheet
Photo checklist
SKU label format
Shipping-supply tracker
Facebook Marketplace response scripts
Sourcing trip planner
Batch listing workflow
Item condition description template
Content Templates
Blog-post outline
Newsletter issue template
Short-video script
Social-media caption framework
Carousel layout
Podcast episode outline
YouTube description template
Content repurposing planner
Testimonial graphic template
Promotional email sequence
Home and Family Templates
Weekly meal planner
Family budget worksheet
Vacation planner
Chore chart
School information sheet
Emergency contact page
Birthday-party planner
Sports schedule
Moving planner
Memorial-program template
Family routine chart
Creative Templates
Invitation
Printable sign
Gift certificate
Product label
Thank-you card
Planner page
Journal page
Worksheet
Workbook page
Presentation
Media kit
Digital vision board
What Makes a Strong Template?
A useful template has:
☐ One specific user
☐ One clear purpose
☐ A recognizable finished result
☐ Logical sections
☐ Clear labels
☐ Helpful placeholders
☐ Simple instructions
☐ Enough flexibility to customize
☐ Consistent formatting
☐ A clean original design
☐ A tested sharing or delivery method
The customer should quickly understand:
What the template is for
What information they need
Where to enter it
What they may change
How to save or export the finished result
Step 1: Choose One Specific User
Do not design for everyone.
Choose one primary user.
Examples:
Beginner reseller
Busy parent
Freelance designer
New business owner
Local service provider
Content creator
Teacher
Coach
First-time event host
Vendor
Newsletter publisher
Virtual assistant
Student
Nonprofit organizer
Complete this sentence:
This template is for __________________________________.
The intended user affects:
Language
Instructions
Design
Number of sections
Experience level
File format
Amount of guidance
Included examples
Step 2: Identify the Repeated Task
Ask:
What does the user create repeatedly?
Where do they usually begin from scratch?
What information do they enter every time?
What process is easy to forget?
What task feels confusing?
What must remain consistent?
What takes longer than it should?
What would be easier with a starting framework?
Complete this sentence:
The user repeatedly needs to __________________________.
Examples:
Create product listings. Plan weekly meals. Send new-client welcome emails. Organize a workshop. Publish a newsletter. Track inventory and profit. Create promotional graphics.A good first template solves one repeated task.
Step 3: Define the Finished Result
Ask:
What should the user have after completing the template?
Examples:
A finished product listing
A complete client proposal
A planned newsletter issue
A weekly meal plan
A project schedule
A ready-to-publish graphic
A calculated profit record
A completed presentation
A customized invitation
A documented procedure
Complete this sentence:
After using the template, the user will have ___________
__________________________________________________.
The finished result should be easy to recognize.
Step 4: Choose the Template Type
Document Template
Best for:
Guides
Proposals
Agreements
Scripts
Letters
Plans
Procedures
Client documents
Possible tools:
Google Docs
Microsoft Word
Canva Docs
Spreadsheet Template
Best for:
Tracking
Calculations
Budgets
Calendars
Inventory
Research
Planning
Reporting
Possible tools:
Google Sheets
Microsoft Excel
Airtable
Presentation Template
Best for:
Workshops
Webinars
Training
Pitches
Reports
Lessons
Social carousels
Possible tools:
Google Slides
PowerPoint
Canva
Graphic Template
Best for:
Social posts
Invitations
Signs
Flyers
Product labels
Promotional graphics
Printables
Possible tools:
Canva
Adobe Express
Photoshop
Affinity Designer
Email Template
Best for:
Customer follow-up
Welcome messages
Sales outreach
Support replies
Launch emails
Newsletter sections
Possible tools:
Google Docs
Email platform
HighLevel
Word
Workflow Template
Best for:
Project steps
Repeated tasks
Client onboarding
Content production
Listing batches
Event preparation
Team procedures
Possible tools:
Google Docs
Trello
Notion
Asana
ClickUp
HighLevel
Step 5: Choose the Editing Platform
The customer must be able to use the template.
Consider:
☐ Does the customer need a free account?
☐ Does the customer already use this platform?
☐ Can the customer make a copy?
☐ Can the customer edit it on mobile?
☐ Can the customer download the finished result?
☐ Will fonts and graphics remain available?
☐ Are there licensing restrictions?
☐ Will the file work internationally?
☐ Is specialized software required?
For beginners, familiar and widely available tools may be easiest.
Common options include:
Google Docs
Google Sheets
Google Slides
Microsoft Word
Microsoft Excel
PowerPoint
Canva
Notion
Airtable
Trello
Step 6: Decide What Should Be Prebuilt
A template should contain enough structure to save time.
Possible prebuilt elements include:
Title
Section headings
Questions
Labels
Tables
Columns
Formulas
Checkboxes
Example copy
Instructions
Brand-neutral colors
Page numbers
Placeholder graphics
Sample entries
Export settings
Ask:
What parts would the user otherwise need to create from scratch?
Build those parts into the template.
Step 7: Decide What the User Will Customize
Clearly identify editable areas.
The user may customize:
Name
Business name
Contact information
Dates
Prices
Product details
Images
Colors
Fonts
Headings
Descriptions
Formulas
Categories
Schedule
Calls to action
Links
Use clear placeholder wording.
Examples:
[BUSINESS NAME] [INSERT DATE] [ADD PRODUCT DESCRIPTION] [UPLOAD YOUR IMAGE] [ENTER PRICE] [REPLACE WITH YOUR CALL TO ACTION]Avoid vague placeholder wording such as:
Type hereTell the user what belongs in the field.
Step 8: Map the Template Structure
Before designing, list every section.
Example product-listing template:
1. Product title
2. Brand
3. Size
4. Condition
5. Measurements
6. Features
7. Flaws
8. Shipping details
9. Search keywords
10. Customer description
Example workshop-planning template:
1. Workshop outcome
2. Intended audience
3. Main lesson
4. Agenda
5. Activities
6. Materials
7. Promotion
8. Follow-up
Structure Review
☐ Every section supports the finished result.
☐ The sections appear in a logical order.
☐ Required information is clearly marked.
☐ Optional sections are identified.
☐ Repeated information is removed.
☐ The template is not more complicated than the task.
Step 9: Create Clear Labels
Labels should tell the user exactly what to enter.
Weak:
DetailsStronger:
Describe the item’s condition.Weak:
NotesStronger:
Record any flaws the buyer should know about.Weak:
GoalStronger:
What should the customer accomplish?Use plain, direct language.
Step 10: Add Instructions
A template should not require the customer to guess how it works.
Instructions may include:
How to make a copy
How to replace placeholders
Which fields are required
Which fields are optional
How formulas work
How to add or remove rows
How to upload images
How to change colors
How to save
How to export
How to print
Where to get support
Instructions may appear:
On the first page
In a separate guide
Inside comments
In highlighted boxes
In a short video
In a delivery email
Step 11: Add an Example Version
An example helps the user understand the finished result.
You may provide:
One completed sample page
One example row
One sample email
One filled-out worksheet
One completed graphic
One sample formula
One example project
Label it clearly:
EXAMPLE SAMPLE ONLY REPLACE WITH YOUR INFORMATIONDo not leave example information in the customer’s final copy without identifying it.
Step 12: Add Optional Prompts
Prompts help the user think through what to enter.
Examples:
What problem does this product solve? What should the customer do next? What information must the buyer know? What result should this project produce? What deadline affects this plan? What evidence supports this claim?Prompts are especially useful in:
Business templates
Writing templates
Planning templates
Content templates
Client templates
Workshop templates
Step 13: Use Reusable Formatting
Create consistent formatting for:
Titles
Headings
Subheadings
Body text
Tables
Checkboxes
Input fields
Instructions
Examples
Warnings
Notes
The user should easily recognize:
What is an instruction
What is an example
What they should replace
What should remain
Which fields are optional
Step 14: Protect Important Elements
Depending on the platform, you may want to:
Lock formula cells
Protect spreadsheet ranges
Group design elements
Lock backgrounds
Keep instructions on a separate page
Preserve master copies
Provide a view-only original
Tell users to make their own copy
Do not make the template so restricted that the customer cannot use it.
Protect only the elements that prevent accidental damage or confusion.
Step 15: Build a Clean Master Copy
Your master copy should remain unchanged.
Suggested naming:
TM-001-MASTER-product-listing-templateThe master should contain:
Final structure
Correct formulas
Approved instructions
Example content
Consistent formatting
Working links
Proper permissions
Current version number
Never send your only editable master file directly to customers.
Step 16: Create a Customer Copy
The customer version may include:
Editable fields
Clean placeholders
Instructions
Sample content
Locked formulas
Duplicate pages
Copy link
Download file
Suggested naming:
product-listing-template-editableRemove:
Internal notes
Private comments
Draft content
Hidden customer data
Unused pages
Personal account information
Your working research
Step 17: Test the Template From a Clean Copy
Do not test only the master.
Create a clean customer copy and use it as though you purchased it.
Test:
☐ The copy or download link works.
☐ The correct file opens.
☐ The customer can edit the intended fields.
☐ Protected areas remain protected.
☐ Fonts display correctly.
☐ Formulas work.
☐ Links work.
☐ Images can be replaced.
☐ Instructions are clear.
☐ Sample content can be removed.
☐ The finished result can be exported.
☐ The file works on another device.
Step 18: Ask a Beginner to Test It
Choose someone similar to the intended customer.
Ask them to complete the template without your help.
Observe:
Where they hesitate
Which instructions they miss
Which fields confuse them
What they accidentally change
What they expect but cannot find
Whether they understand the final result
Whether they can save or export it
Ask:
☐ Did you know where to begin?
☐ Were the labels clear?
☐ Were the instructions easy to follow?
☐ Did you understand what to replace?
☐ Was anything missing?
☐ Was anything unnecessary?
☐ Could you complete the template?
☐ Could you save or export the finished result?
Step 19: Review Accessibility and Usability
A useful template should be easy to navigate.
Check:
☐ Body text is readable.
☐ Colors have sufficient contrast.
☐ Instructions do not rely only on color.
☐ Required fields are clearly identified.
☐ Tables are easy to follow.
☐ Formulas are explained when needed.
☐ Writing spaces are large enough.
☐ Mobile use was considered.
☐ Keyboard navigation was considered when appropriate.
☐ The template works in grayscale when printable.
Step 20: Confirm the Template License
You must decide what customers may do with the template.
Personal Use
The customer may use the template for their own personal projects.
Business Use
The customer may use it inside their own business.
Client Use
The customer may use the completed template while serving direct clients.
Commercial End-Product Use
The customer may use the template to create finished products for customers, but may not resell the original editable template.
Private Label or Resale Rights
The customer may edit, rebrand, or resell the template under specific terms.
This requires especially clear licensing.
Do not offer rights you do not understand or have permission to grant.
Step 21: Write the Usage Terms
Personal-Use Example
This template is for personal use only. You may customize and use it for your own projects. You may not resell, redistribute, share, upload, or claim the original template as your own.
Business-Use Example
You may customize and use this template within your own business. You may not resell, redistribute, share, sublicense, or offer the editable template to others.
Client-Use Example
You may customize the template and use the completed result with your direct clients. You may not transfer, resell, or provide the original editable template as a standalone product.
Clearly explain:
What the customer may edit
What they may create
Whether client use is allowed
Whether commercial use is allowed
Whether sharing is allowed
Whether resale is allowed
Whether attribution is required
Step 22: Review Asset Licenses
Before selling a template, review the licenses for:
Fonts
Photos
Icons
Graphics
Illustrations
Mockups
Design elements
Stock assets
AI-generated assets
Platform-provided elements
A license that permits use in a finished PDF may not permit distribution inside an editable template.
This is especially important when the buyer can extract, reuse, or redistribute an individual asset.
When uncertain:
Replace the asset
Use your own asset
Use a properly licensed alternative
Link the customer to the asset instead
Provide instructions for replacing it
Step 23: Avoid Restricted or Unavailable Elements
Your customer may not have access to:
Premium fonts
Paid platform elements
Licensed stock photos
Premium icons
Special integrations
Advanced formulas
Paid software features
Before publishing, ask:
☐ Can the customer access every included element?
☐ Will premium assets require an additional purchase?
☐ Is the requirement clearly disclosed?
☐ Will the template still work without the asset?
☐ Can I replace it with a free alternative?
Do not surprise the customer with hidden software or asset costs.
Step 24: Create More Than One Version When Useful
Possible versions include:
Filled example
Blank template
US Letter
A4
Color
Ink-friendly
Beginner version
Advanced version
Google version
Microsoft version
Canva version
Printable PDF
Editable file
Do not create extra versions unless they add real value.
Every version creates additional testing and update work.
Step 25: Create the Instruction Guide
Your instruction guide may include:
1. What the template does
2. Who it is for
3. What is included
4. Required software or account
5. How to access it
6. How to make a copy
7. How to customize it
8. How to use special features
9. How to save or export
10. Usage terms
11. Support information
A simple template may need only one page of instructions.
A more technical spreadsheet may need a detailed guide.
Step 26: Add a QuickStart Section
Example:
QUICKSTART 1. Open the template link.
2. Select File and choose Make a Copy.
3. Rename your copy.
4. Replace the highlighted placeholders.
5. Review the finished content.
6. Export or save your completed version.
The QuickStart should help the user begin immediately.
Step 27: Create Preview Images
Possible preview images include:
Main template cover
Blank version
Completed example
Included pages
Editable fields
Features
File formats
Software requirements
Mobile or desktop view
Before-and-after result
Preview images should accurately show the product.
Do not display editable content in a way that allows the entire paid template to be copied.
Step 28: Create a Product Mockup
A mockup may show the template on:
Laptop
Tablet
Smartphone
Printed page
Clipboard
Desk
Binder
Presentation screen
Include a clear statement when needed:
Digital template. No physical product will be shipped.
Do not imply that a device, printing, binder, or physical item is included.
Step 29: Choose How You Will Use the Template
Sell It Individually
Possible platforms include:
Etsy
Gumroad
Payhip
Shopify
HighLevel
Your own website
Use It as a Lead Magnet
A simple template may grow:
Email list
Newsletter
Membership
Community
Service leads
Workshop registrations
Add It to a Membership
Templates can provide recurring value because members can use them immediately.
Include It With a Service
Examples:
Client onboarding template
Project-planning template
Content template
Marketing calendar
Workshop template
Reporting dashboard
Bundle It
Combine it with:
Mini guide
Checklist
Worksheet
Prompt pack
Resource list
Video tutorial
Example library
Step 30: Price the Template
Pricing depends on:
Specific outcome
User
Complexity
Time saved
Number of pages or tabs
Formulas
Automation
Instructions
Included examples
File formats
Usage rights
Market competition
Customer support
Update requirements
Possible general starting ranges:
Template TypePossible RangeSimple one-page template$2–$7Small document or graphic template$5–$15Multi-page template$9–$29Spreadsheet with formulas$12–$49Business template system$25–$99+Specialized professional template$35–$150+
These are general examples, not guarantees.
A short template that saves significant time may be more valuable than a large template with unnecessary pages.
Step 31: Write the Product Listing
Include:
Product title
Intended user
Main result
What is included
File type
Platform required
Number of pages, tabs, or designs
Editable elements
Non-editable elements
Instructions
Usage rights
Digital-product notice
Required account or software
Support limitations
Product Listing Template
[PRODUCT TITLE] Save time creating [finished result] with this editable template designed for [intended user]. WHAT YOU CAN CUSTOMIZE • [Editable feature]
• [Editable feature]
• [Editable feature] YOU WILL RECEIVE • [Number] editable template
• [File type or platform]
• [Instruction guide]
• [Example version]
• [Additional files] REQUIRED • [Free or paid account]
• [Software or platform]
• [Skill or device requirements] This is a digital product. No physical item will be shipped. Usage is permitted only as described in the included license.
Step 32: Create the Delivery System
Your delivery may include:
PDF instruction file
View-only template link
Copy link
Downloadable editable file
ZIP folder
Membership access
Email instructions
Video tutorial
Do not place a publicly editable master link inside the product.
Use:
View-only access
Template-copy links
Duplicate links
Customer downloads
Protected master files
Step 33: Test the Complete Purchase or Sign-Up Flow
Test:
☐ The checkout or form works.
☐ The confirmation page appears.
☐ The delivery email arrives.
☐ The instruction file opens.
☐ The template link works.
☐ The customer can make a copy.
☐ The customer does not edit the master.
☐ Required access is explained.
☐ The correct files are included.
☐ Support information is available.
☐ The next-step offer works.
Test in a browser where you are not already signed into the template owner account.
Step 34: Protect the Master Template
Use a master-template system.
Suggested structure:
MASTER TEMPLATE
↓
CUSTOMER COPY
↓
EXAMPLE COPY
↓
UPDATED VERSION
Protect the master by:
Limiting editing permission
Storing it in a private folder
Keeping a backup
Using a view-only or copy link
Removing private metadata
Testing permissions
Creating an update log
Step 35: Assign a Product Number
Suggested format:
TM-001
TM-002
TM-003
TM represents Template Maker.
Track:
Product number
Product title
Template type
Intended user
Finished result
Platform
File format
Number of pages or tabs
License
Price
Product URL
Sales or downloads
Version
Last update
Next review date
What You Could Earn or Gain
A template may support:
Direct product sales
Email-list growth
Membership value
Client services
Workshop registrations
Product bundles
Affiliate recommendations
Licensing
Audience trust
Repeat customers
Business efficiency
Lead generation
One template may also become:
Mini guide
Checklist
Workbook
Prompt pack
Video tutorial
Workshop
Course
Template bundle
Membership collection
Client service
Software tool
Common Beginner Mistakes
Creating a Template for Everyone
Choose one specific user and result.
Making the Template Too Complicated
A template should reduce work, not create more work.
Designing Before Mapping the Process
List the required sections before choosing colors and fonts.
Using Vague Placeholders
Tell the customer exactly what belongs in each field.
Forgetting Instructions
Do not assume the customer knows how to use the platform or file.
Sharing the Editable Master
Use a copy link, view-only file, or downloadable duplicate.
Using Assets Without the Correct License
Editable-template use may have different licensing restrictions than a finished PDF.
Including Paid Elements Without Disclosure
Tell customers when premium software, fonts, or assets are required.
Failing to Test Formulas
One broken formula can make a spreadsheet template unusable.
Failing to Test Permissions
The customer may receive no access—or accidentally gain access to the master.
Showing Features That Are Not Included
Preview images must match the actual product.
Forgetting Usage Rights
Explain whether personal, business, client, or commercial use is permitted.
Make It Easier With AI
AI can help you:
Brainstorm template ideas
Identify repeated tasks
Define the intended user
Map the process
Create section labels
Write instructions
Create example content
Develop placeholder text
Review usability
Create product descriptions
Write promotional content
Develop related-product ideas
AI should not be your only source for:
Legal agreements
Tax templates
Medical forms
Financial calculations
Safety procedures
Professional compliance
Current platform requirements
Formulas requiring technical accuracy
Verify important information and calculations.
Template Maker AI Prompt
Help me plan an original, reusable digital template. Template topic:
[topic] Intended user:
[audience] Repeated task:
[task] Finished result:
[outcome] Template type:
[document, spreadsheet, presentation, graphic, email, or workflow] Platform:
[Google Docs, Google Sheets, Canva, Word, Excel, PowerPoint, or other] Create: 1. A clear template title
2. A short product description
3. The recommended template structure
4. Required sections or fields
5. Optional sections
6. Clear placeholder wording
7. Short instructions
8. One completed example
9. A QuickStart process
10. Common user mistakes
11. Testing checklist
12. Usage-rights considerations
13. Preview-image ideas
14. Five related product ideas Keep the template focused on helping one specific user complete one recognizable result. Do not copy existing products. Do not create or invent legal, medical, financial, safety, tax, regulatory, professional, platform, or compliance requirements. Clearly identify any formulas, policies, licenses, or claims requiring verification.
Your Template Maker Challenge
☐ Choose one specific user.
☐ Identify one repeated task.
☐ Define the finished result.
☐ Select the template type.
☐ Choose the editing platform.
☐ Map the complete process.
☐ Identify what should be prebuilt.
☐ Identify what the user will customize.
☐ Create clear sections and labels.
☐ Add helpful placeholders.
☐ Add instructions.
☐ Create a completed example.
☐ Use consistent formatting.
☐ Protect important elements.
☐ Create a clean master copy.
☐ Create the customer version.
☐ Test the template from a clean copy.
☐ Ask a beginner to test it.
☐ Review usability and accessibility.
☐ Confirm asset licenses.
☐ Write usage terms.
☐ Create the instruction guide.
☐ Create preview images.
☐ Choose the price or free-offer goal.
☐ Write the product listing.
☐ Set up and test delivery.
☐ Protect the master template.
☐ Assign a product number.
Your Next Action
Complete these three sentences:
I am creating a template for __________________________.
It will help them ____________________________________.
Instead of starting from scratch, they will begin with
__________________________________________________.
Then list every section, field, or element the template needs.
That is the beginning of your Template Maker Win.


