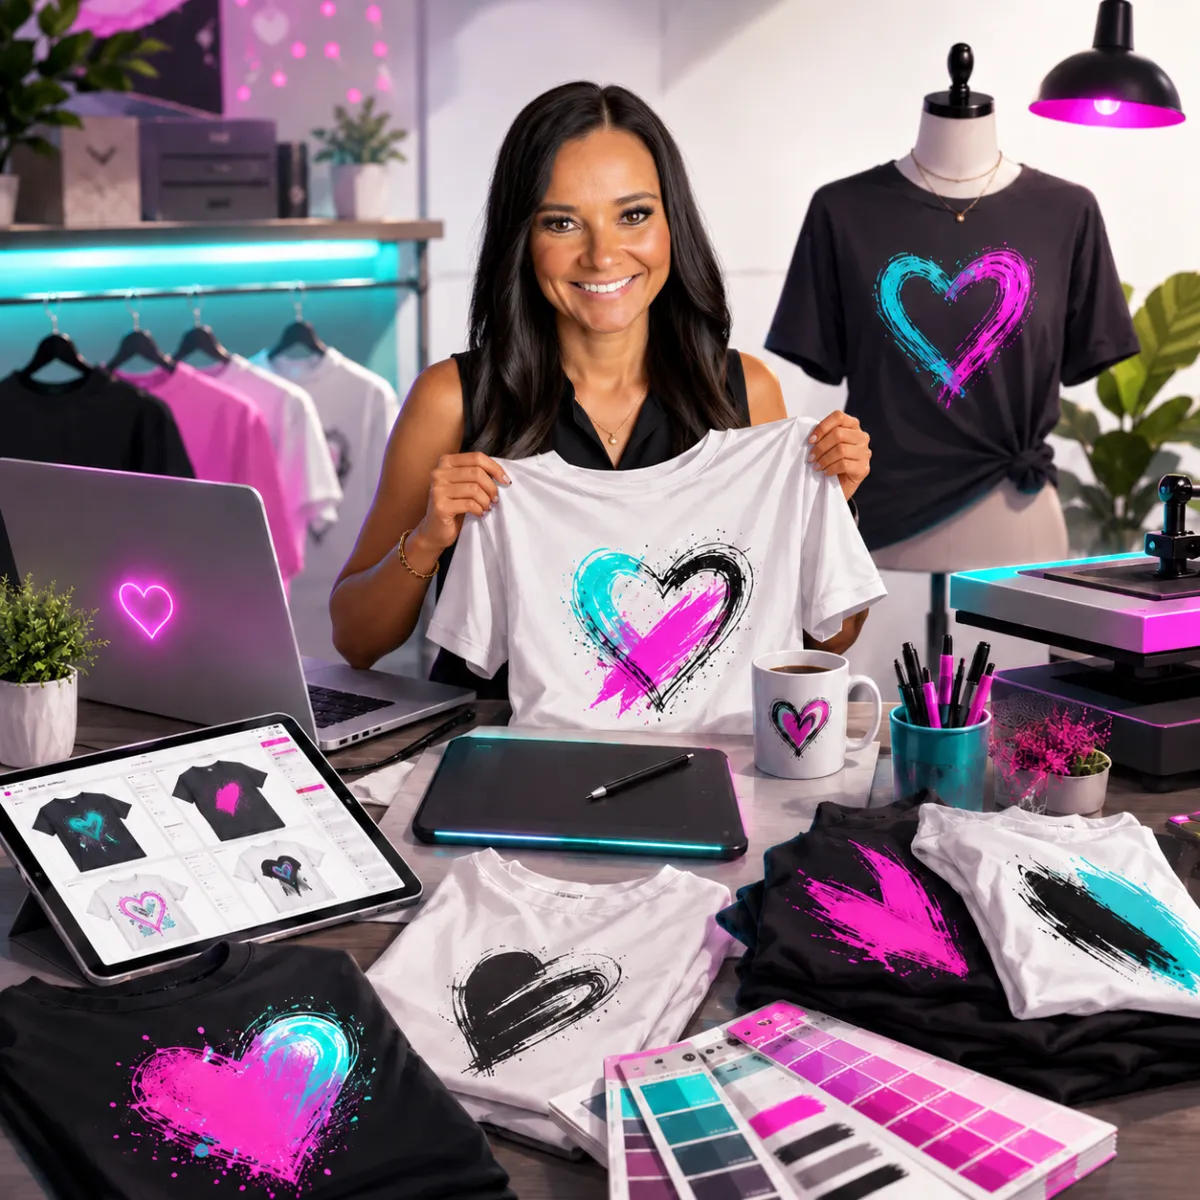
Make T-Shirts or Apparel
Turn a Simple Design Into Wearable Products People Can Buy, Wear, Gift, or Share
Custom apparel is one of the most recognizable ways to turn a creative idea into a physical product.
You can create:
T-shirts
Sweatshirts
Hoodies
Tank tops
Hats
Tote bags
Team shirts
Event shirts
Business apparel
School spirit wear
Family reunion shirts
Birthday shirts
Bridal-party shirts
Club shirts
Fundraiser shirts
Local business merchandise
Hobby or niche apparel
You do not need to become a clothing manufacturer.
You can start with:
One shirt + one audience + one design.
That is enough to complete the Apparel Maker Win.

What Is the Apparel Maker Win?
The Apparel Maker Win is creating one original apparel product that is tested, customer-ready, priced, photographed, and offered for sale.
Your first Win might be:
Create one T-shirt design for one specific audience, produce a sample, verify the fit and print quality, calculate your costs, photograph it, and offer it for sale.
You do not need:
100 designs
Every shirt color
Every size
Industrial equipment
A warehouse of blank shirts
A fashion brand
A giant Etsy shop
Start with one.
Quick Overview
Category: Make
Badge: Apparel Maker
Experience Level: Beginner
Startup Cost: Under $50 possible
Time to Start: One weekend
Work Style: From Home / Local / Online
Income Type: One-Time + Repeatable Income
Recommended First Goal: Create and offer one apparel product
Why Apparel Can Work
People already buy apparel for:
Everyday wear
Identity
Humor
Hobbies
Teams
Groups
Businesses
Schools
Events
Causes
Holidays
Travel
Gifts
Family occasions
The opportunity is not simply:
“Sell shirts.”
It is:
Create a shirt that says something a specific person wants to wear.
That could communicate:
Who they are
What they love
What they believe
What group they belong to
What event they attended
What role they play
What makes them laugh
Start With the Person, Not the Shirt
A beginner may start with:
“I want to make T-shirts.”
That is too broad.
Instead:
“I want to make funny shirts for beginner resellers.”
or:
“I want to make local softball mom shirts.”
or:
“I want to create employee shirts for local businesses.”
or:
“I want to create family reunion shirts.”
Now you have an audience.
That makes everything easier:
Design
Wording
Shirt style
Colors
Pricing
Photography
Marketing
Sales channel
Step 1: Choose One Audience
Possible audiences:
Moms
Dads
Teachers
Coaches
Resellers
Bakers
Gardeners
Travelers
Small-business owners
Sports parents
Students
Clubs
Families
Local communities
Businesses
Event attendees
My Audience
Step 2: Choose the Reason They Would Wear It
Your shirt may communicate:
☐ Identity☐ Humor
☐ Hobby
☐ Profession
☐ Team
☐ School
☐ Event
☐ Family
☐ Cause
☐ Local pride
☐ Business brand
☐ Celebration
☐ Other
Main Reason
Step 3: Choose One Apparel Product
Start with one.
☐ T-shirt☐ Sweatshirt
☐ Hoodie
☐ Tank top
☐ Long-sleeve shirt
☐ Hat
☐ Tote
☐ Other
My First Product
A T-shirt is often the easiest first product because:
Blanks are widely available
Sizing is familiar
Printing options are plentiful
Customers understand the product
Shipping can be relatively straightforward
Step 4: Choose the Product Style
Not all shirts feel the same.
Consider:
Unisex
Women's cut
Youth
Heavyweight
Lightweight
Soft-style
Performance
Cotton
Blend
My Product Style
Why?
Step 5: Choose the Design Concept
A strong first shirt typically has one main idea.
Possible:
Original phrase
Simple typography
Original illustration
Local theme
Profession joke
Hobby theme
Event name
Family name
Business logo
Team phrase
Personalized design
My Design Concept
Step 6: Keep the Design Simple
Your first product does not need:
Front print
Back print
Sleeve print
Custom tag
Five ink colors
Personalized sleeve
Multiple layouts
Try:
One design on one print location.
Example:
Front center chest
That is enough.
Step 7: Decide Whether the Shirt Is Personalized
Product Type
☐ Fixed design☐ Personalized design
☐ Group customization
If Personalized, Customer Can Change
☐ Name☐ Number
☐ Date
☐ Team
☐ School
☐ Business name
☐ Other
Personalization can increase value but also increases production complexity.
Step 8: Choose How You Will Produce It
There are multiple paths.
Option 1: Heat Transfer Vinyl
You cut material and apply it with heat.
Useful for:
Simple text
Names
Numbers
Small runs
Personalized shirts
Option 2: Sublimation
Design becomes part of the material using heat.
This works only with appropriate products and materials.
Verify your exact blank and process before selling.
Option 3: DTF Transfers
You purchase or produce transfers and apply them to apparel.
This can work well for:
Full-color graphics
Small runs
Detailed artwork
Repeatable designs
Option 4: Screen Printing
Often useful for larger quantities of the same design.
It may make more sense when producing:
Team orders
Events
Businesses
Fundraisers
Clubs
You can outsource screen printing instead of doing it yourself.
Option 5: Embroidery
Useful for:
Hats
Polos
Sweatshirts
Business apparel
You can also outsource embroidery.
Option 6: Print-on-Demand
A supplier prints and fulfills the product after the order.
Possible advantages:
No blank inventory
No production equipment
Supplier handles fulfillment
Possible disadvantages:
Less production control
Less packaging control
Lower margins in some cases
Shipping and production depend on provider
Option 7: Local Production Partner
You create the design and sell the product.
A local printer handles production.
This can be a very practical way to test apparel before buying equipment.
Step 9: Choose Your Production Method
My Method
Why This Method?
Equipment Required
Equipment I Already Own
What I Would Need to Buy
Step 10: Avoid Buying Equipment Too Early
Ask:
Can I create Product #1 without buying another machine?
Possible alternatives:
Buy a transfer
Outsource printing
Use print-on-demand
Hire a local printer
Borrow equipment
Use equipment you already own
Your first goal is to test the product.
Not build a factory.
Step 11: Research the Blank Apparel
Record:
Brand
Style / Model
Supplier
Unit Cost
$________________
Material
Available Sizes
Available Colors
Fit Description
Supplier Size Chart Available?
☐ Yes☐ No
Step 12: Do Not Guess at Sizing
Sizing may vary by:
Brand
Style
Gender cut
Material
Product line
Always use the size information for the exact blank you sell.
Sizes Offered
☐ XS☐ S
☐ M
☐ L
☐ XL
☐ 2XL
☐ 3XL
☐ Youth
☐ Other
Size Chart Source
Step 13: Choose Shirt Colors
Do not offer every color available.
Start with perhaps:
BlackWhite
Heather Gray
One Accent Color
My Shirt Colors
Fewer colors simplify:
Inventory
Photography
Design testing
Customer ordering
Step 14: Test the Design on Each Color
A black design may disappear on a dark shirt.
A white design may disappear on a light shirt.
For each color, verify:
☐ Contrast☐ Readability
☐ Print quality
☐ Design placement
☐ Overall appearance
Step 15: Create the Design at the Correct Size
Print Location
☐ Full front☐ Left chest
☐ Full back
☐ Sleeve
☐ Other
Design Width
Design Height
Placement
The correct size depends on:
Shirt size
Design shape
Print method
Customer preference
Physically test it.
Step 16: Create One Physical Sample
Your first sample helps you evaluate:
Blank quality
Design size
Placement
Colors
Production method
Fit
Feel
Washability
Photography
Packaging
Sample Size
Sample Color
Sample Cost
$________________
Step 17: Inspect the Sample Before Washing
Check:
☐ Design is straight.☐ Design is centered.
☐ Design size looks appropriate.
☐ Print is clear.
☐ Colors look correct.
☐ No visible defects.
☐ Shirt is clean.
☐ Product matches design.
Problem Found
Step 18: Perform a Wash Test
If applicable to your product and process, test the finished apparel before selling it.
Record:
Wash Method
Drying Method
Number of Washes
Result
☐ Passed☐ Needs improvement
☐ Failed
Changes Observed
Do not claim wash durability beyond what you have verified.
Step 19: Test Fit
If possible:
Try on the sample
Ask someone in the intended audience to try it
Compare measurements with size chart
Sample Size
Fit
☐ Runs small☐ Expected
☐ Runs large
☐ Need more testing
Do not generalize one person's experience as universal sizing.
Step 20: Create Care Instructions
Use verified information from:
Apparel manufacturer
Print/transfer supplier
Your own production testing
Possible instructions may involve:
Wash temperature
Turning garment inside out
Drying method
Ironing
Bleach
Dry cleaning
Use only the instructions appropriate for your actual product.
Step 21: Calculate the Direct Product Cost
Your real cost might include:
Blank apparel+ print / transfer
+ production materials
+ packaging
+ label
+ transaction fees
+ marketplace fees
+ production waste
= direct product cost
Blank
$________________
Print / Transfer
$________________
Other Materials
$________________
Packaging
$________________
Fees
$________________
Waste Allowance
$________________
Total Direct Cost
$________________
Step 22: Track Your Time
Design Preparation
________________ minutes
Order Preparation
________________ minutes
Production
________________ minutes
Quality Control
________________ minutes
Packaging
________________ minutes
Customer Communication
________________ minutes
Total
________________ minutes
Step 23: Research Comparable Apparel
Search for products serving the same:
Audience
Design type
Apparel category
Occasion
Look at:
Shirt brand when disclosed
Material
Color options
Size range
Design
Price
Shipping
Processing
Reviews
Common complaints
Use the research to understand customer expectations.
Do not copy another creator's design.
Step 24: Set the Selling Price
Consider:
Direct product cost
Production time
Design effort
Fees
Packaging
Market positioning
Product quality
Personalization
Direct Cost
$________________
Planned Price
$________________
Approximate Gross Profit Before Other Business Expenses
$________________
Formula:
Selling Price– Direct Product Cost
= Approximate Gross Profit Before Other Business Expenses
Example
Suppose:
Blank shirt: $5.50Transfer: $3.00
Production materials: $0.75
Packaging: $1.25
Other direct costs: $1.00
Approximate direct cost:
$11.50
If sold for:
$28Approximate amount remaining before broader business expenses:
$16.50This is an illustration only.
It does not represent guaranteed pricing or profit.
Step 25: Consider Size-Based Costs
Larger apparel sizes may sometimes cost more from suppliers.
If your costs differ:
Standard Sizes
$________________
Extended Sizes
$________________
Will Pricing Differ?
☐ Yes☐ No
Make pricing clear to customers.
Step 26: Create a Simple Product Offer
Example:
Reseller Life T-Shirt
Unisex soft-style shirt
4 colors
Sizes S–3XL
Original front design
$28
That is much easier than launching 50 combinations.
Step 27: Create the Listing Title
Formula:
Design Theme + Product + Audience
Examples:
Funny Reseller T-Shirt for Online Sellers
Softball Mom Shirt
Personalized Family Reunion T-Shirt
Custom Employee Business Shirt
Teacher Life Graphic Tee
My Listing Title
Step 28: Write the Product Description
Include:
What It Is
Who It Is For
Product Details
Material
Fit
Sizes
Colors
Design
Care
Processing
Delivery
Step 29: Create a Size Chart Graphic
Your product images should include the exact size information for the blank being sold.
Include:
Size
Width
Length
Measurement method if needed
Avoid creating a generic size chart and applying it to unrelated blanks.
Step 30: Create the Product Photography
Capture:
Hero image
Full front
Design close-up
Shirt texture/material
Shirt worn or styled
Size chart
Available colors
Packaging
Actual product photography can build more trust than mockups alone.
Step 31: Use Mockups Carefully
Mockups can help customers visualize:
Colors
Styling
Lifestyle
Design placement
But the product should not look materially different from what you actually sell.
Include actual product photos when possible.
Step 32: Create a Color Chart
Show the actual colors being offered.
Color 1
Color 2
Color 3
Color 4
If color varies by screen, say so appropriately.
Step 33: Create a “How to Order” Section
For a fixed design:
1. Select your size.2. Select your shirt color.
3. Add to cart.
For personalization:
1. Select your size.2. Select your shirt color.
3. Enter personalization.
4. Review spelling.
5. Complete your order.
Step 34: Create a Quality-Control Checklist
Before packaging:
☐ Correct product☐ Correct size
☐ Correct color
☐ Correct design
☐ Correct personalization
☐ Correct spelling
☐ Design straight
☐ Placement correct
☐ Print quality acceptable
☐ Shirt clean
☐ No visible defects
☐ Packaging correct
Step 35: Create a Production Checklist
Example:
☐ Review order☐ Confirm size
☐ Confirm color
☐ Inspect blank
☐ Prepare design
☐ Prepare transfer / print
☐ Verify dimensions
☐ Position design
☐ Produce shirt
☐ Allow finishing time if required
☐ Inspect print
☐ Complete quality control
☐ Fold
☐ Package
☐ Label
☐ Fulfill
Step 36: Choose Your First Sales Channel
Possible:
Etsy
Facebook Marketplace
Facebook groups
Website
Instagram
TikTok
Local events
Schools
Teams
Businesses
Clubs
Fundraisers
Word of mouth
My First Channel
Step 37: Consider Local Apparel Opportunities
Local apparel can create strong opportunities.
Sports Teams
Player shirts
Parent shirts
Coach shirts
Tournament shirts
Schools
Spirit wear
Clubs
Staff shirts
Event shirts
Businesses
Employee shirts
Event shirts
Branded apparel
Events
Reunions
Birthdays
Memorials
Fundraisers
Trips
Group celebrations
Step 38: Consider Group Orders
A single group may order:
10 shirts
25 shirts
50 shirts
100 shirts
That changes your production planning.
Group Order Potential
☐ Low☐ Moderate
☐ Strong
Best Possible Group
Step 39: Create a Group Order Process
Collect:
☐ Contact name☐ Organization
☐ Design
☐ Quantities
☐ Sizes
☐ Colors
☐ Personalization
☐ Required-by date
☐ Delivery
☐ Payment terms
☐ Approval
Use a spreadsheet for larger size lists rather than collecting everything through messages.
Step 40: Create a Size Breakdown Sheet
SizeQuantityXSSMLXL2XL3XL
Total Shirts
Step 41: Create a Personalized Group Sheet
For jerseys, team shirts, reunion shirts, etc.
#NameSizeColorNumber / Personalization123
Structured data helps reduce mistakes.
Step 42: Consider Business Apparel
Local businesses may need:
Staff shirts
Event apparel
Trade-show shirts
Promotional products
Work shirts
This can lead to repeat orders.
Potential Business Type
Product
Approximate Quantity
Step 43: Consider Event Apparel
Possible events:
Family reunions
Destination trips
Birthday trips
Bachelorette parties
Bachelor parties
Graduations
Memorial events
Fundraisers
Conferences
One design can create multiple unit sales.
Step 44: Consider Personalized Apparel
Examples:
Name
Number
Graduation year
Family role
City
Team
Business
Event date
Personalization can increase complexity.
Start with one variable.
Example:
Same design + individual name.
Step 45: Consider Limited Releases
Instead of keeping everything available forever, you could offer:
Order by Friday
Then produce all shirts together.
This can work well for:
Teams
Schools
Events
Communities
Small groups
Batch production can reduce complexity.
Step 46: Create an Order Deadline
For group or seasonal orders:
Order Opens
Order Closes
Production Begins
Delivery Target
Do not promise dates you cannot realistically support.
Step 47: Consider Preorders
Preorders can reduce inventory risk.
Instead of buying:
10 shirts in every size and every color
You collect:
Size
Color
Quantity
Payment
Then purchase the required blanks.
Verify that your sales channel and process support the preorder structure you plan to use.
Step 48: Avoid Overstocking Sizes
Apparel inventory can quickly become complicated.
Imagine:
7 sizes
5 colors
That already creates:
35 variations.
Add three shirt styles:
105 variations.
This is why your first apparel product should be intentionally limited.
Step 49: Use a Small Inventory Strategy
Possible approach:
Sample:1 shirt
Customer orders:
Buy blanks as needed
Popular products later:
Keep small inventory
This limits startup risk.
Step 50: Create Product Codes
Suggested:
AP-001AP-002
AP-003
Example:
AP-001Reseller Life Tee
AP-002
Softball Mom Tee
AP-003
Teacher Life Sweatshirt
Step 51: Create a Master Design File
Suggested:
AP-001-MASTER-reseller-lifeIf personalized:
AP-001-ORDER-1001-SMITHNever edit your only master.
Step 52: Track Blank Inventory
ProductColorSizeOn HandReserved
Step 53: Track Transfers or Print Materials
DesignSizeOn HandCost
This can be especially useful if you purchase DTF transfers in batches.
Step 54: Fold and Package Consistently
Possible packaging:
Clear apparel bag
Mailer
Tissue
Thank-you insert
Care card
Branded sticker
My Packaging
Cost
$________________
Step 55: Add a Care Card
Example structure:
CARE FOR YOUR SHIRT
[VERIFIED WASH INSTRUCTION]
[VERIFIED DRY INSTRUCTION]
[OTHER VERIFIED CARE]Thanks for supporting [BUSINESS].
Step 56: Protect Customer Data
For apparel orders, you may collect:
Name
Email
Size
Color
Shipping address
Personalized name or number
Only collect what is necessary.
Avoid storing payment credentials yourself.
Step 57: Review Copyright and Trademark Risks
One of the biggest risks in apparel is assuming a popular phrase or graphic is automatically safe to sell.
Be careful with:
Professional sports teams
Colleges
Movie characters
TV characters
Celebrities
Brand logos
Song lyrics
Famous slogans
Trademarked phrases
Viral designs copied from other sellers
Before selling a design, review your rights.
Step 58: Do Not Assume a Phrase Is Safe
A short phrase may still raise trademark concerns depending on how it is used.
If your business depends heavily on a phrase or brand concept, research it before investing in inventory or advertising.
Step 59: Create Original Apparel Concepts
Strong original concepts can come from:
Your own experiences
Your niche
Original humor
Local sayings you create
Profession-specific observations
Family themes
Hobby culture
Original illustrations
Ask:
What would my specific audience love wearing that I can create originally?
Step 60: Create Content From Production
Apparel works well for visual content.
Possible videos:
Blank shirt → finished shirt
Pressing the design
Peeling a transfer
Folding orders
Packing a group order
New design reveal
Shirt color comparison
Wash-test results
Behind-the-scenes mistakes
Bulk production
One product can generate a lot of content.
What Could You Earn?
Possible apparel revenue sources include:
Individual shirt sales
Personalized orders
Group orders
Team orders
School orders
Business apparel
Event merchandise
Seasonal apparel
Fundraisers
Local events
Online marketplaces
Bundles
Your actual income depends on:
Pricing
Product costs
Production method
Fees
Volume
Demand
Marketing
Shipping
Competition
Labor
There is no guaranteed income.
Example Paths to $500
These examples show gross sales, not profit.
$25 Shirts
20 shirts × $25= $500 gross sales
$30 Shirts
17 shirts × $30= $510 gross sales
$40 Sweatshirts
13 sweatshirts × $40= $520 gross sales
One Group Order
25 shirts × $20= $500 gross sales
Your costs still need to be deducted.
Common Beginner Mistakes
Creating Too Many Designs
Start with one.
Not fifty.
Offering Too Many Shirt Colors
Every new color increases:
Variants
Photos
Inventory
Customer decisions
Offering Too Many Shirt Styles
T-shirt + women's tee + tank + hoodie + crewneck + youth tee is not a beginner product.
Choose one.
Buying Inventory Before Testing
Apparel inventory is especially risky because you must account for both:
Color + size.
Guessing at Sizing
Use the exact manufacturer's information for the blank you sell.
Skipping the Wash Test
A beautiful design that fails after washing creates unhappy customers.
Underpricing Production Time
One shirt may seem fast.
Twenty shirts may expose every inefficient step.
Track time.
Using Designs You Do Not Own
Popular does not mean public domain.
Using Only Mockups
Show customers the real product when possible.
Not Checking Design Placement
A design can be technically centered and still look visually wrong when worn.
Test the actual shirt.
Ignoring Larger-Size Costs
Know your supplier costs for every size you offer.
Trying to Compete Only on Price
You may compete through:
Niche
Originality
Quality
Local convenience
Personalization
Group ordering
Customer service
Make It Easier With AI
AI can help you:
Brainstorm niche ideas
Create original phrase concepts
Develop design directions
Define an audience
Write listings
Create FAQs
Plan photography
Create group-order forms
Build pricing worksheets
Organize inventory
Write local outreach
Plan seasonal releases
Analyze customer feedback
AI should not be used to assume:
A phrase is legally safe
A logo can be used
An image is licensed
A blank has specific care requirements
A production setting will work
Customers will buy
Those require actual research or testing.
Apparel Maker AI Planning Prompt
Help me create one simple apparel product.Audience:
[AUDIENCE]
Reason they would wear it:
[IDENTITY / HUMOR / HOBBY / EVENT / OTHER]
Product:
[T-SHIRT / SWEATSHIRT / OTHER]
Design concept:
[CONCEPT]
Personalized:
[YES/NO]
Production method:
[METHOD]
Equipment I own:
[EQUIPMENT]
Supplier:
[SUPPLIER]
Known blank cost:
[COST]
Available colors:
[COLORS]
Available sizes:
[SIZES]
Budget:
[BUDGET]
Sales channel:
[CHANNEL]
Create:
1. Focused product concept
2. Intended audience
3. Primary use case
4. Apparel style
5. Design direction
6. Recommended number of colors
7. Recommended size range
8. Personalization options if applicable
9. Production method review
10. Equipment actually required
11. Equipment I should not buy yet
12. Supplier research checklist
13. Blank-product verification checklist
14. Size-chart verification checklist
15. Design-size testing plan
16. Placement testing plan
17. Sample-production plan
18. Wash-test plan
19. Fit-test plan
20. Care-information research checklist
21. Direct-cost worksheet
22. Production-time tracker
23. Pricing worksheet
24. Product title
25. Product-description outline
26. Size-chart image plan
27. Color-chart image plan
28. Eight product-photo concepts
29. Production checklist
30. Quality-control checklist
31. Packaging plan
32. Order-intake fields
33. Group-order process
34. Size-breakdown sheet
35. Local selling opportunities
36. Bulk opportunities
37. Seasonal opportunities
38. Content ideas
39. Copyright or trademark questions to research
40. My first three actions
Do not invent product specifications, size information, production settings, care instructions, supplier pricing, marketplace fees, licensing rights, or customer demand.
Clearly flag anything requiring physical testing or current verification.
Apparel Maker Challenge
Complete these before claiming the Win:
☐ I chose one audience.☐ I identified why they would wear the product.
☐ I chose one apparel item.
☐ I chose one apparel style.
☐ I created one design concept.
☐ I selected one production method.
☐ I identified required equipment.
☐ I avoided unnecessary equipment purchases.
☐ I researched the exact blank.
☐ I verified available sizes.
☐ I verified the size chart.
☐ I limited shirt colors.
☐ I tested design contrast.
☐ I tested design size.
☐ I tested placement.
☐ I created a physical sample.
☐ I inspected the sample.
☐ I completed relevant wash testing.
☐ I reviewed fit.
☐ I verified care information.
☐ I calculated direct product cost.
☐ I tracked production time.
☐ I researched comparable apparel.
☐ I selected a selling price.
☐ I created a clear product offer.
☐ I created the listing.
☐ I created a size chart graphic.
☐ I photographed the actual product.
☐ I created a color chart.
☐ I created how-to-order instructions.
☐ I created production steps.
☐ I created quality control.
☐ I chose one sales channel.
☐ I reviewed group-order opportunities.
☐ I created a size-breakdown process when needed.
☐ I created packaging.
☐ I reviewed customer privacy.
☐ I reviewed copyright and trademark concerns.
☐ I offered the product for sale.
Your Next Action
Complete these five lines:
My audience is: ____________________________________
I am creating a: ___________________________________
They would wear it because: ________________________
The design concept is: _____________________________
I will produce it using: ____________________________
Then create one real sample.
Do not launch an apparel collection yet.
Your first goal is one tested, customer-ready piece of apparel someone can actually order.
Once that exists, you are on your way to earning the Apparel Maker Badge.


